This is the USDA’s “Beans, Dry, with Tomato or Molasses Sauce” recipe: we just adjusted the seasoning of it so that the beans will taste like baked beans, even though they aren’t actually (neither are tinned baked beans from the store! Though you could say, they are baked in the jar.) If your audience prefers more of an English-style tomato sauce on the beans, follow the tomato sauce seasoning guidelines that the USDA gives.
It’s easy to double or triple this recipe, as it’s really no extra work to do so, provided you have a large enough pressure canner with the capacity (such as a 23 quart one.)
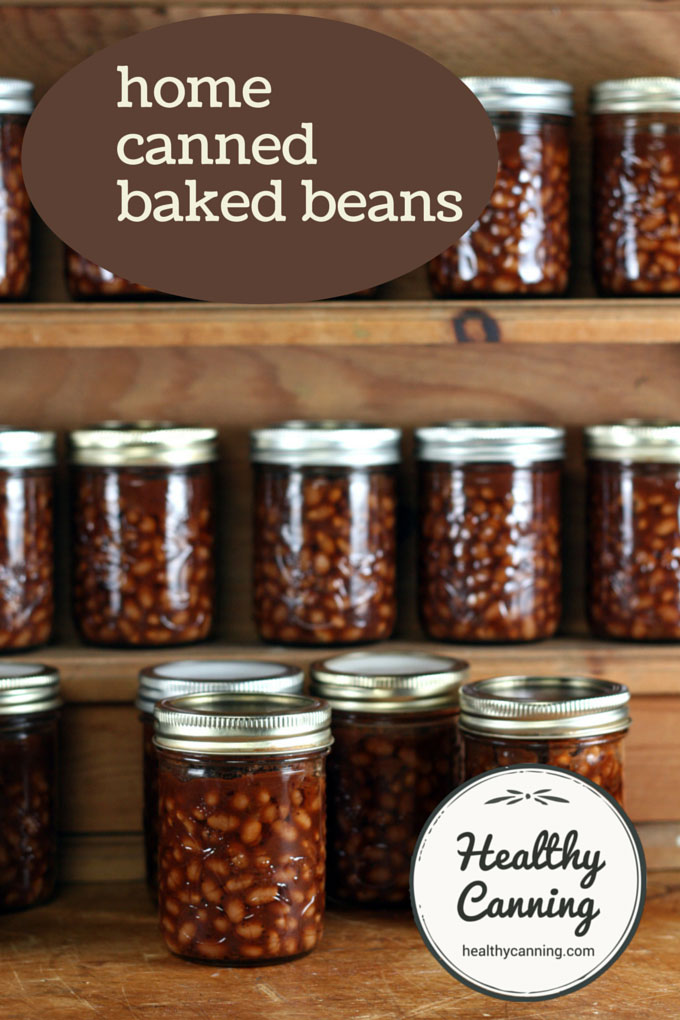
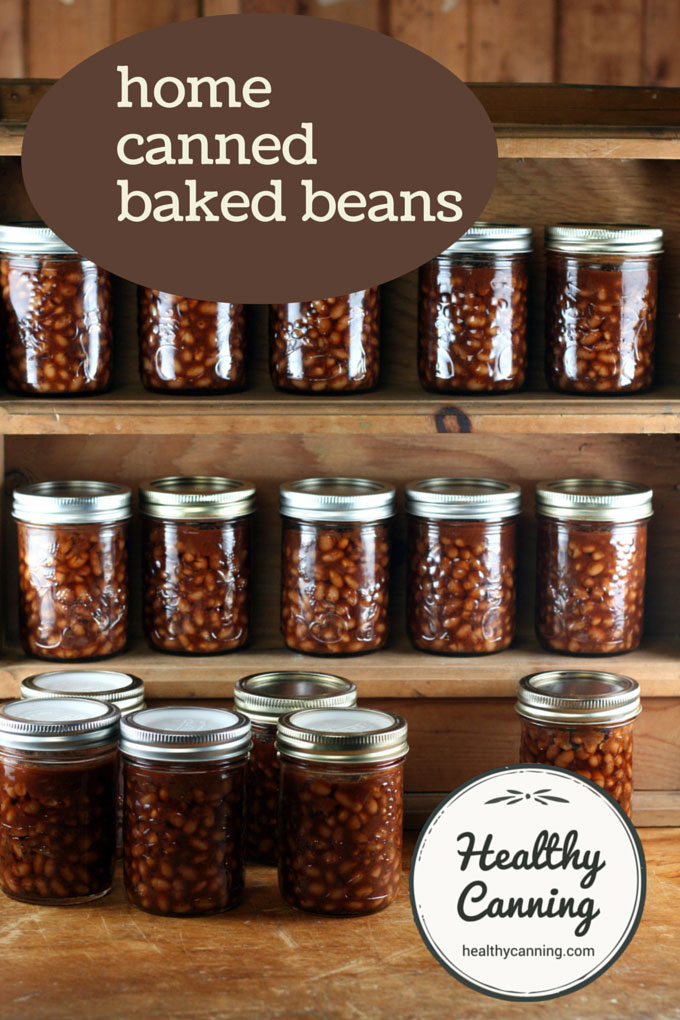
The quarter-litre (1 cup / 8 oz) sizes are great for people to take for lunches or for singleton friends to have along with their breakfast or suppers — and, they’re more realistic in terms of calories of what a portion of baked beans should be. Because while this is wholesome, and no baked beans are ever going to be healthier, it’s still hearty, with a fair portion of your daily calories (around 300).
Larger family-size jars are nice to have on hand as well for quick shared lunches. Try these beans on pancakes, too, for breakfast, with a few lashings of maple syrup! Delicious!
The recipe
Jar size choices metric: Either quarter-litre (250 ml) OR half-litre (500 ml) OR 1 litre
Jar size choices US: Either ½ US pint (8 oz) OR 1 US pint (16 oz) OR 1 US quart (32 oz)
Processing method: Pressure canning only
Yield: 3 x half-litre (US pint) jars
Headspace: 3 cm (1 inch)
Processing pressure: 10 lbs (69 kPa) weighted gauge, 11 lbs (76 kpa) dial gauge (adjust pressure for your altitude when over 300 metres / 1000 feet)
Processing time: quarter-litre (½ US pint) OR half-litre (1 US pint): 65 minutes. 1 litre (1 US quart): 75 minutes.

Home canned baked beans
Ingredients
- 500 g navy beans (dried . 2 cups / 1 pound)
- 175 g onion (finely chopped. 1 cup / 6 oz)
- 6 tablespoons tomato paste (low-sodium if desired)
- 1 ½ tablespoons Worcestershire Sauce
- 1 ½ teaspoons mustard powder
- 1 ½ teaspoons salt
- 1 ½ teaspoons ground black pepper
- 3 tablespoons brown sugar
- 1 tablespoon Kitchen Bouquet (optional, for deep colouring)
- 2 bay leaves
- 750 ml bean liquid (3 cups / 24 oz. Recipe will produce it.)
Instructions
- Put dried beans in a pot. Add 1 ½ litres (6 cups) of water. Boil 2 minutes, remove from heat and let stand for an hour, covered.
- Make your sauce flavouring mixture by mixing together everything from onion down to Kitchen Bouquet (if using) in a large microwave-safe bowl or jug; set aside.
- Drain the beans, discarding the soaking water.
- Put beans in a large pot, add 2 bay leaves, cover with 2 to 5 cm (1 to 2 inches) of water, bring to a full boil, boil for a minute or two, then turn off the heat. Don't boil much longer or you will end up with mooshy beans at the end of everything.
- Drain the beans in a way that will preserve the water this time. (See suggestions in notes.) Discard the 2 bay leaves.
- Take 750 ml (3 cups / 24 oz ) of that reserved water. Add it to the sauce flavouring mixture you had set aside, cover that bowl or large jug and zap in microwave for 5 minutes to make a sauce.
- Take the sauce out of the microwave, stir (mind the surge). Set aside.
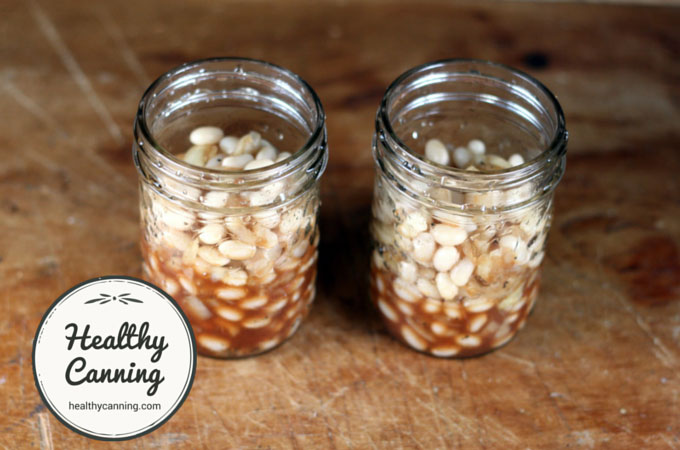
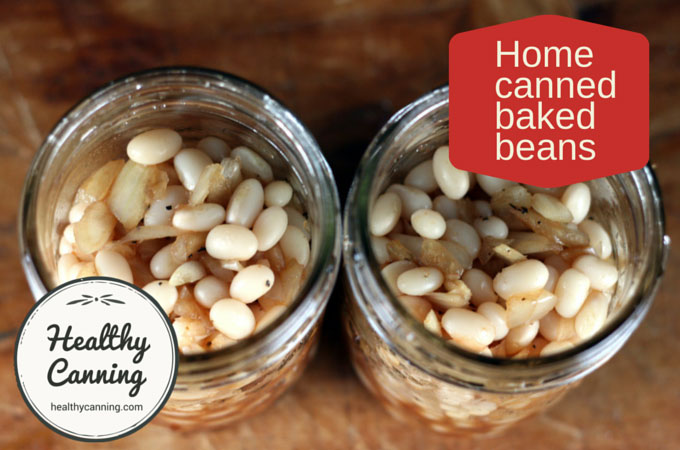
- The headspace on this recipe is 3 cm (1 inch) per jar. Bearing that in mind and taking that into account, fill each heated jar (minus that reserved headspace in your mind) ¾ full of plain beans.
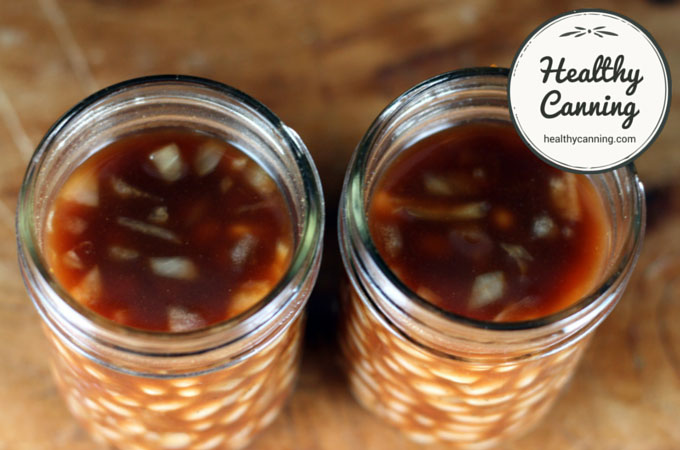
- Fill up the remaining ¼ of each jar with sauce, leaving still the 3 cm (1 inch) headspace.
- At this point, the USDA notes that you may "add a ¾-inch (2 cm) cube of [raw presumably] pork, ham, or [raw] bacon to each jar, if desired."
- Add additional water to jars from the reserved bean stock if you run short on sauce.
- Debubble, then top up with a bit more sauce or bean stock as needed to maintain the 2 cm (1 inch) headspace.
- So to recap, a jar will 3 cm (1 inch) blank headspace at the top. Of the remaining jar space below that, ¾ of that space will be plain beans, then ¼ plain sauce.
- Debubble, adjust headspace.
- Wipe jar rims.
- Put lids on.
- Processing pressure: 10 lbs (69 kPa) weighted gauge, 11 lbs (76 kpa) dial gauge (adjust pressure for your altitude when over 300 metres / 1000 feet)
- Processing time: quarter-litre (½ US pint / 250 ml) OR half-litre (1 US pint): 65 minutes. 1 litre (1 US quart): 75 minutes.
Nutrition
Processing guidelines below are for weighted-gauge pressure canner. See also if applicable: Dial-gauge pressures.
| Jar Size | Time | 0 to 300 m (0 - 1000 feet) pressure | Above 300 m (1000 ft) pressure | |
|---|---|---|---|---|
| ¼ litre (½ US pint) | 65 mins | 10 lbs | 15 lb | |
| ½ litre (1 US pint) | 65 mins | 10 lbs | 15 lb | |
| 1 litre (1 US quart) | 75 mins | 10 lbs | 15 lb |

Reference information
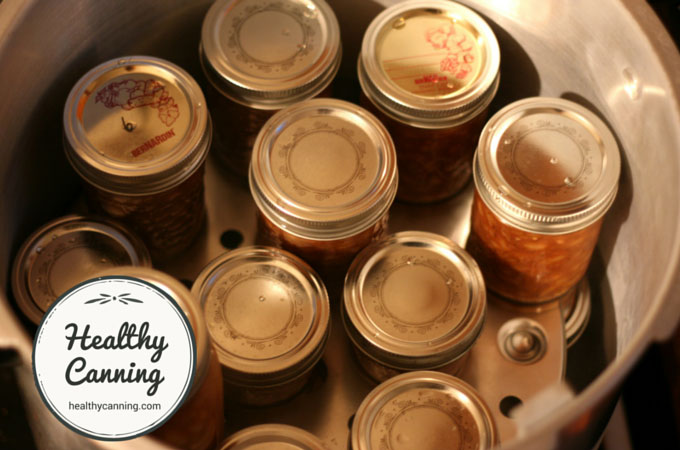
How to pressure can.
When pressure canning, you must adjust the pressure for your altitude.
Shelf life for home-canned goods
Alternative sauces
If your crowd prefers English-style tomato sauces on their baked beans, see these sauce alternatives for baked beans over on the National Center site.
Recipe notes
- Instead of the salt, you can use a non-bitter, non-clouding salt sub. We have found Herbamare Sodium-Free performs well in that regard.
- You can reduce the sugar, or use the same volume amount of granulated Splenda®, or 3 tablespoons of molasses, or 1 ½ teaspoons of liquid stevia. For stevia, we’d recommend Better Stevia liquid stevia.
- Instead of tomato paste, you can use tomato ketchup (if you want your beans to be low-sodium, then choose a low-sodium ketchup.)
- If you are using dehydrated onion, ¼ cup (4 tablespoons) dried onion flakes = 1 cup fresh chopped. Rehydrate fully first in boiling water. It’s fine to reduce or leave out the onion if your crowd are not onion fans.
- To play with flavour, you can try adding any or all of these: ½ teaspoon ground cloves, ½ teaspoon ground allspice, ½ teaspoon ground mace, 1 teaspoon maple extract flavouring, per batch
- One reason that bean soaking water is discarded is that many people believe flatulence-causing sugars leech into the soaking water, so that by getting rid of it, you are making the beans “less musical.” For what it’s worth, the efficacy of this is actually disputed and the science is still out on this. For home canning purposes, there could be a second reason, that of leeching off and getting rid of some bacteria that might be on the beans, so you will definitely want to discard the initial soaking water as they suggest. We’re not sure why they decided to recommend the “quick soak” method in hot water as opposed to an overnight soak.
- To drain the beans in a way that will preserve the second batch of water that was used to par-boil them: either fish them out in scoops using a slotted spoon, or using a small strainer as a scoop (a spider is ideal), or, put a very large strainer or colander over a large bowl and pour the beans and water in, so that the water will get trapped in the bowl while your beans get drained. This sounds more complicated than it is: basically figure out a way to get drained beans by themselves in a large bowl with no water. Discard the bay leaves, if using.
- Don’t worry that the beans are pale and hard, and that the mixture appears to be “pale hard crunchy bean soup” going into the canner. The beans will absorb the sauce and its colouring and it will all thicken up and mix up beautifully in the canner. You actually do want it soupy and liquidy going in to allow for this, and thus to avoid density issues so that heat can travel evenly throughout the jar.
- If you are doubling or tripling the batch, be sure to do the math first on the back of an envelope. Don’t trust your mind to keep it all straight in the thick of it all. A 23 quart pressure canner will hold 18 of the quarter-litre (1 cup / 8 oz) jars.
- roughly 4 to 5 times the recipe will fill a 23-quart pressure canner with half-litre (1 pint) jars.
- If you are tripling the batch, you may not need to exactly triple the amount of black pepper. You may be happy with only a doubled amount of black pepper. Likewise, if you are using freshly ground black pepper, you may wish to use only half the amount as its hotness can come through very strongly in pressure canning for some people’s tastes.
Recipe source
Beans, Dry, with Tomato or Molasses Sauce. In: United States Department of Agriculture (USDA). Complete guide to home canning. Agriculture information bulletin No. 539. 2015. Page 4-6.
Baked beans & Beans with Pork and Tomato Sauce. Bernardin Guide to Home Preserving. Toronto, Canada: Bernardin Ltd. 2013. Pp 96 and 97.
Modifications made:
- Adjusted sauce seasoning;
- Added Kitchen Bouquet for deep-baked appearance;
- Increased onion (from 1 tbsp to 1 cup) based on the Bernardin recipes listed above. If your family are not onion fans, feel free to just use the 1 tbsp, or omit entirely.
Nutrition
Serving size: 250 ml (1 cup/ 8 oz)
Weight Watchers Freestyle SmartPoints®: 125 ml (½ cup / 4 oz ) = 1 point; 250 ml (1 cup / 8 oz) = 2 points.
Sugar and salt-free version nutrition
Per 250 ml (1 cup/ 8 oz): 332 calories, 259 mg sodium
Weight Watchers PointsPlus®: 125 ml (½ cup / 4 oz ) = 4 points; 250 ml (1 cup / 8 oz) = 7 points.
Weight Watchers Freestyle SmartPoints®: 125 ml (½ cup / 4 oz ) = 1 point; 250 ml (1 cup / 8 oz) = 1 point.
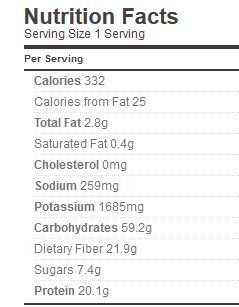
* Nutrition info provided by https://caloriecount.about.com
* PointsPlus™ calculated by healthycanning.com. Not endorsed by Weight Watchers® International, Inc, which is the owner of the PointsPlus® registered trademark.

History
For many years, the USDA actually recommended against home canning baked beans. Here’s what they said on a radio show in 1944:
Among other foods not recommended for home canning, are baked beans…. These are difficult to can at home.” [1] USDA Office of Information. Homemaker’s Chat. 13 July 1944. Page 2.

Homemakers Chat. For Broadcast. USDA Office of Information. Thursday, 13 July 1944. Click to enlarge
By 1952, the department had not only changed its mind, but was providing full directions — in photographic splendour, modelled by an Evelyn West.
1952 home canned baked beans USDA. Click to enlarge
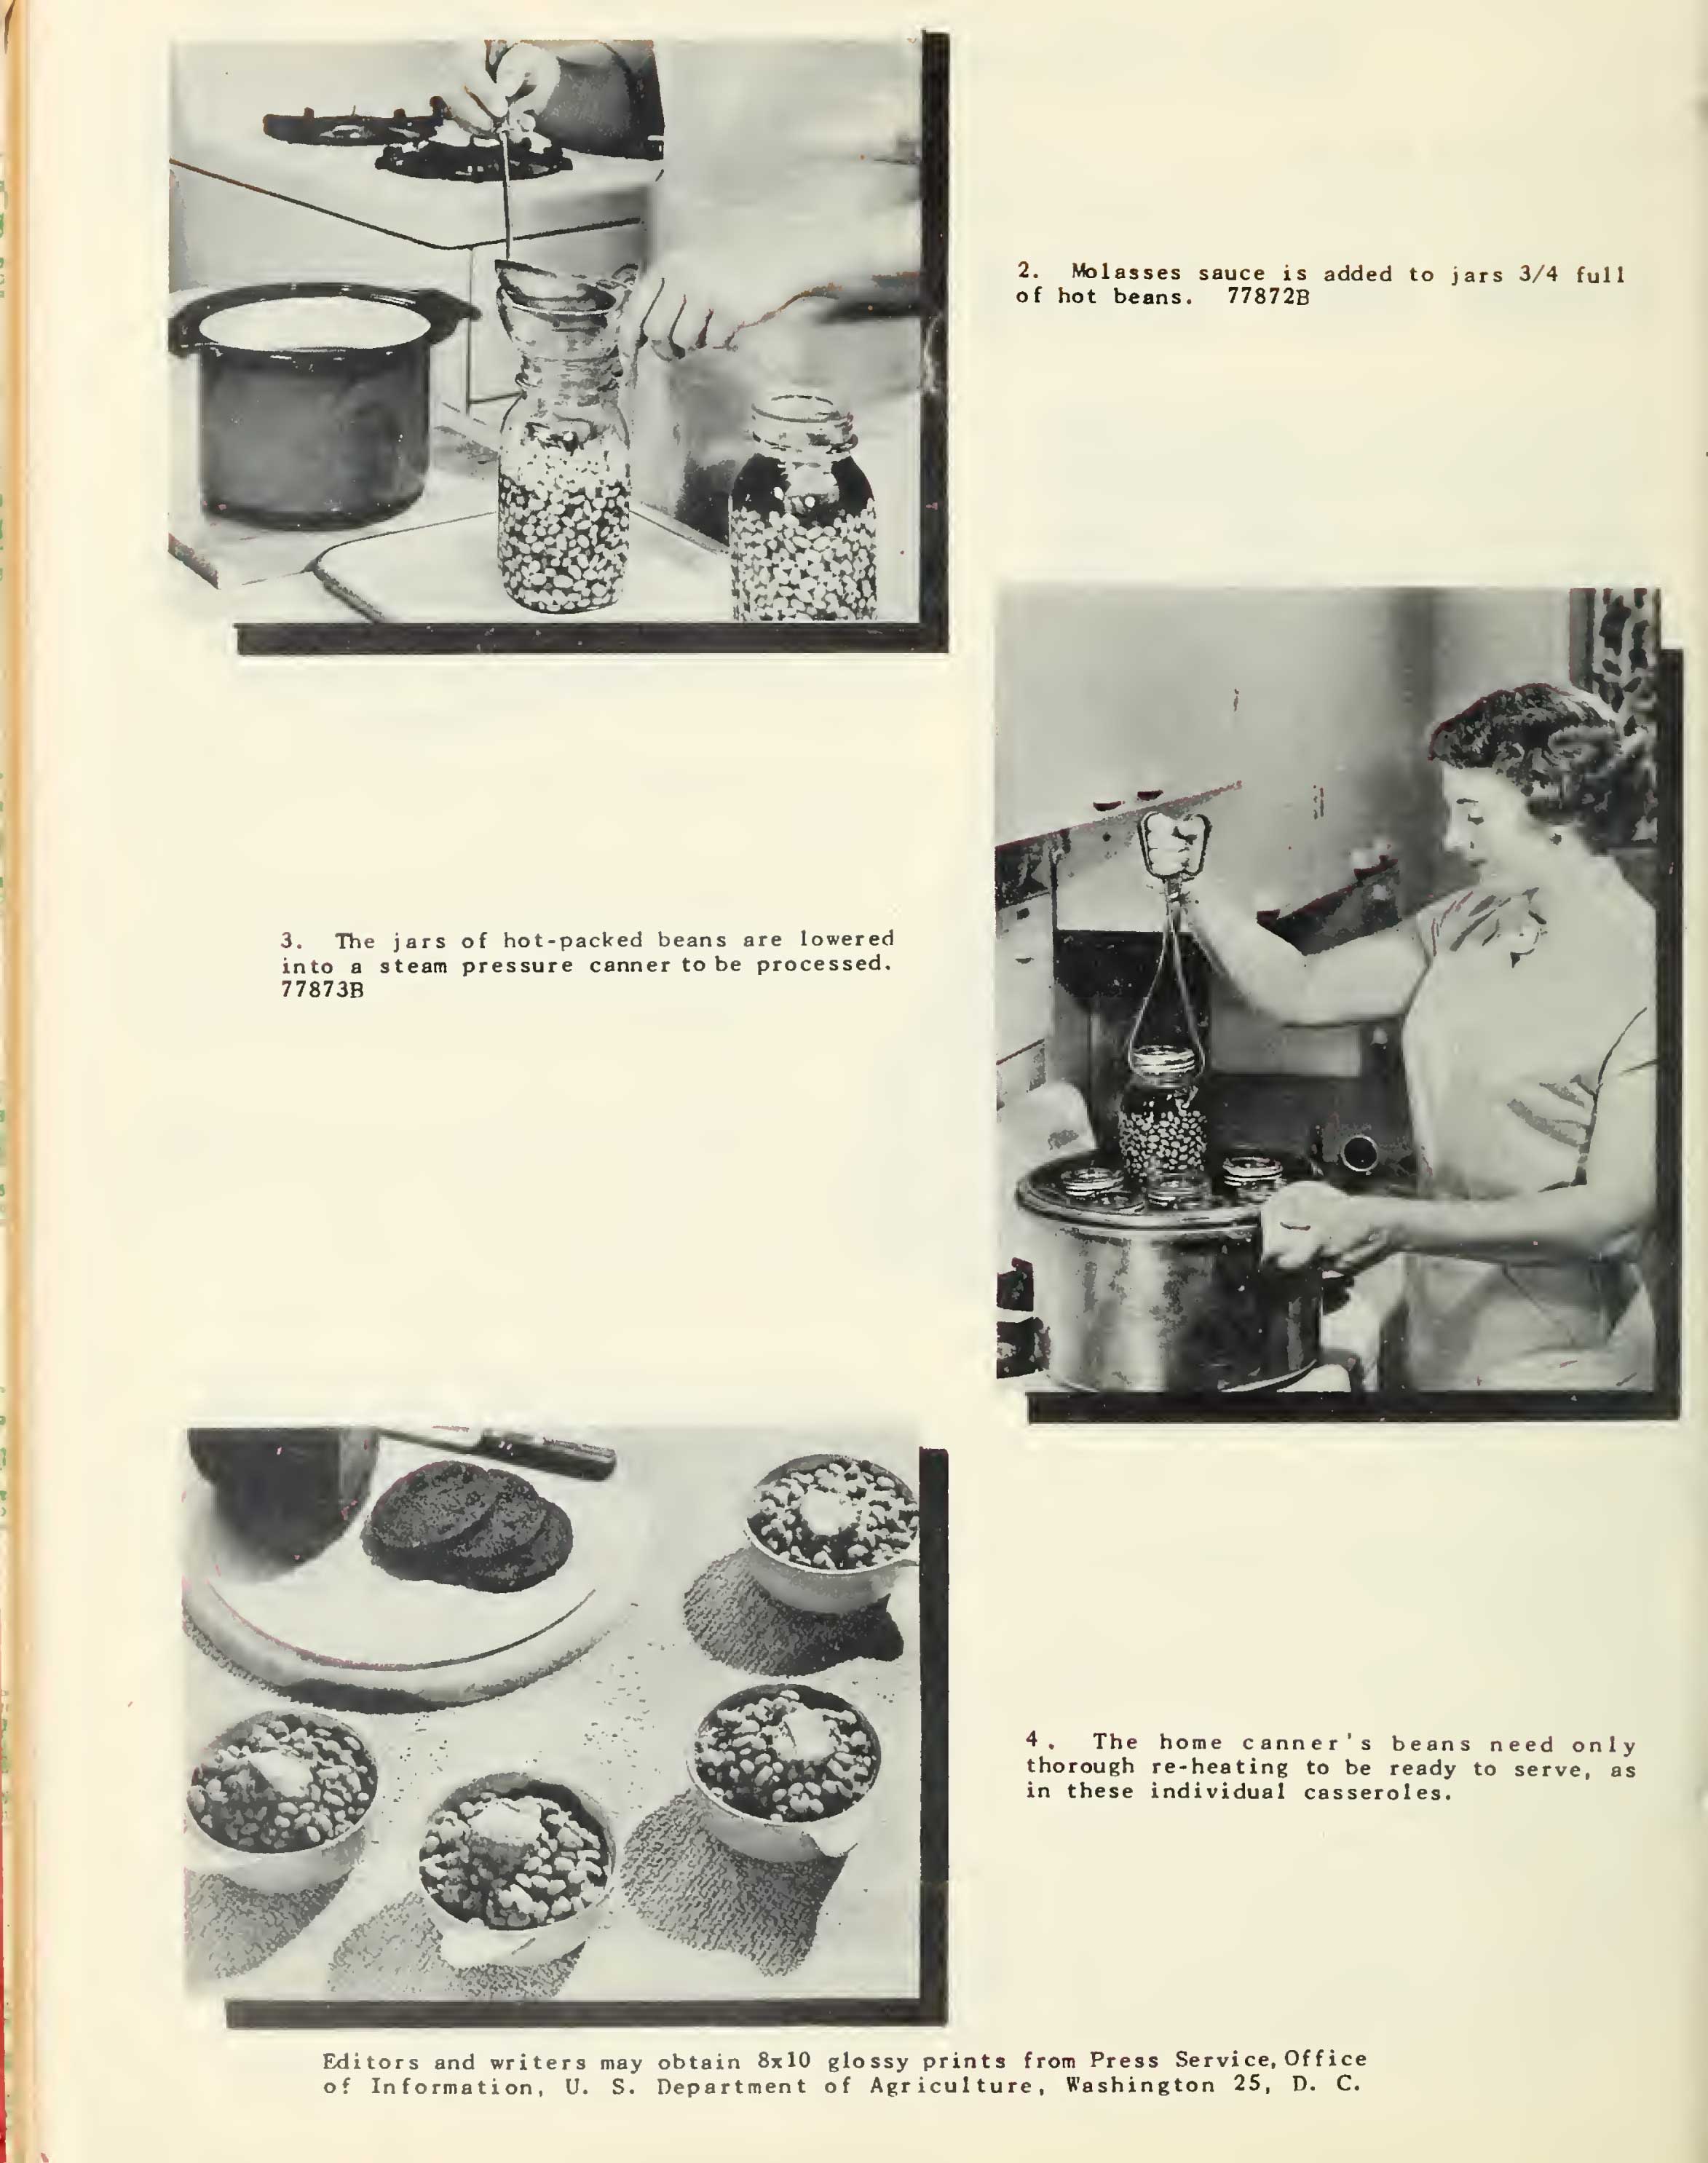
Home canned baked beans USDA. Click to enlarge
The only change in procedure since 1952 seems to be an increase in headspace from ½ inch to 1 inch. ( Source: USDA Office of Information. Pork Beans: Home canned. Picture story no. 84. 6 February 1952. )
Still, however more glamorous the 1950s publications, always follow the most recent edition of the USDA Complete Guide (currently dated 2015.)
References
Marie
I liked the ease of this recipe. Family found that more brown sugar enhanced the taste. Gotta tweak the exact amount but when more brown sugar was added, they tasted like bush’s beans.
Patrice
Would it be safe to replace the brown sugar with maple syrup? (There’s a note about using molasses, so maybe they are similar enough?)
Natalia
Thank you so much for this! I’m looking for the UK-style beans in tomato sauce, which you recommend using the USDA recipe to get, however, there are two tomato sauce recipes on that link. Which one would give the UK-style results? (As you seem to know the difference or you wouldn’t have mentioned it! 🙂 ) I’d rather get close to what we like on the first try rather than experimenting. Thank you again so much for any help.
Healthy Canning
Try Tomato Sauce version 1, but without the spicing. Or Tomato Sauce version 2, but add a bit of sugar (maybe 3 tablespoons or to taste). It is okay to tweak the seasonings to taste. You could also Google “heinz baked beans copycat” to get some seasoning ideas (just ignore any suggestions to add cornstarch you might find.)
In terms of the sauce and “critical control factor” for safety, the important thing is just that there be a liquid, even plain boiling water would do in that regard, that is thickened no more than would be from the addition of molasses or tomato paste. (Don’t add any starch thickeners for safety reasons.) Any seasonings added to a liquid of that description is really up to you.
Natalia
Thank you so much for the thoughtful reply. It’s very helpful.
Carolyn W.
I processed mine in my pressure canner for 65 minutes (for pints) as stated in your recipe. Most other recipes that I have checked out for canning baked beans list processing time as 75 minutes for pints. Needing to decide what to do. Any recommendations?
Healthy Canning
The lab-tested time for this recipe is indeed 65 minutes for US pints / half-litres. The recipe was developed by the USDA and has been retested several times over the years to ensure that it still meets safety standards.
Peter
Overall I was pleased with the results, but surprised by the lack of sweetness when compared to a commercially produced can of beans. The ground pepper did add a pleasant amount of mouth warmth. Is it safe to increase the amount of sugar to this recipe or other tested baked bean recipes? I think I would like a happy medium between the candy like taste of commercially prepared canned beans and this recipe.
Healthy Canning
The sweetness is a seasoning and yes it is safe to tweak seasonings in canning recipes. See: Safe Tweaking of Home Canning Recipes
Leslie
Would love to hear how the beans turned out. What is their consistency? I’ve heard many people say when the are soaked and par boiled they turn out mushy and prefer dry canning beans. Could you please let me know. Thanks, would love to make these
Libbie
I had tons of dried beans which I wasn’t using because of my chronic inability to soak beans in advance for cooking, so I have canned most of them plain for quicker use when I’m in a cooking mood… I also made several ready-to-eat bean-centric products for quick meals, including this one. I’ve got my final 7 pints of baked beans in the canner right now. This is a very tasty recipe and I found it quite easy. However, I did find that I ended up with way more beans than sauce, so other home canners might want to make a double batch of sauce relative to their quantity of beans, just to be on the safe side.
Thanks for a great recipe!
Lisa G
I agree. Next time I’m making more sauce. Other than that we love this recipe.
Pat Marrion
I don’t own a microwave. Where the recipe says to “zap” the mix, should I just heat it on stove (to a boil?)?
Healthy Canning
Yes
Bean
Can the onions be removed from this recipe? Maybe substituted with onion powder instead? My kids are beyond picky
Healthy Canning
Yes, that would be a safe substitution.
Linda
Is there a way to add bacon?
Healthy Canning
Yes, the USDA says, “Add a 3/4-inch cube of pork, ham, or bacon to each jar, if desired”. We’ll add this to the recipe.
Gwindolyn
Can you process these in a water bath if you don’t have a pressure canner.
Healthy Canning
You cannot use a water bath canner in any way, shape or form. Use another regular recipe for baked beans, and freeze those, if you want to preserve baked beans.
Jean Van Over
We make cowboy bean which consist of various types of bean together with hamburger. Would you be able to can it and for how long would you process it?
Healthy Canning
It would be fine to home-can various types of dried beans together, using the standard dried beans canning directions. We’d suggest opening a canned jar of those, which will save you a ton of time already, and then adding the hamburger and going from there.
Jody
After soaking and following the directions to a T (I thought) my beans came out and looked really good, however the beans were HARD. Did I not soak them long enough. Was it because maybe they were old beans or what. The taste was great but just hard. Or should I have pressured them longer?
Healthy Canning
After soaking, did you do the parboil? ” bring to a full boil, boil for a minute or two, then turn off the heat.” and made sure you got the full boil? If so, maybe they were really really old beans?
Naomi Carroll
Hello – I’m very new to canning and just processed my first batch of beans. One of the jars looks as though there is no liquid in it. Is it possible for me to send/post pictures so that I may receive feedback on it? I would like to know if it is likely safe to store in the cupboard and advice on what I may have done incorrectly. Only one of 6 jars did this. I’m thinking I may have added too many beans and not enough juice. I do not know how to proceed.
Thank you in advance.
Naomi
Healthy Canning
I had that happen too in my first few batches of baked beans, even though I’d followed the USDA directions exactly (including pre-soaking and partially cooking the beans.) What’s happened is either the beans soaked up more liquid, or, the jar vented and lost some liquid, or I’d been sold a batch of super-dry beans that were just still really thirsty even after the pre-soak and cook. For the next time, I’d resolve to make sure that your baked beans seem even a bit soupy going into the jar. Cause when they are, and come out of the pressure canner after, the sauce will have thickened up a lot and be just right — well in any event, I stopped getting the super-dry seeming jars.
As for the current jar, if it’s really and truly “solid bean”, I personally would break the seal on the jar and refrigerate and use in a few days, or empty into a baggie and freeze. Just because otherwise, knowing me, I will spend the next few days agonizing over it; I personally like to be 190% sure of the food I put on my shelf because I know my mind will stress over it otherwise.
But at the same time, having said that, and out of “intellectual interest”, you might wish to contact the National Center for Home Food Preservation at https://nchfp.uga.edu/contact_more_info.html, and ask if you can send them your photo. They are very helpful, and kind, and no question is too small for them. It might take them a day or two to get back as they struggle with little funding but they do get back as fast as they can. It would be great to know the proper answer, just for the record, and if you do do that and get an answer, I’d love to hear it because I’ve been there too and I’m sure others have. In the meantime, maybe at least refrigerate the jar, even if you don’t pop the seal.