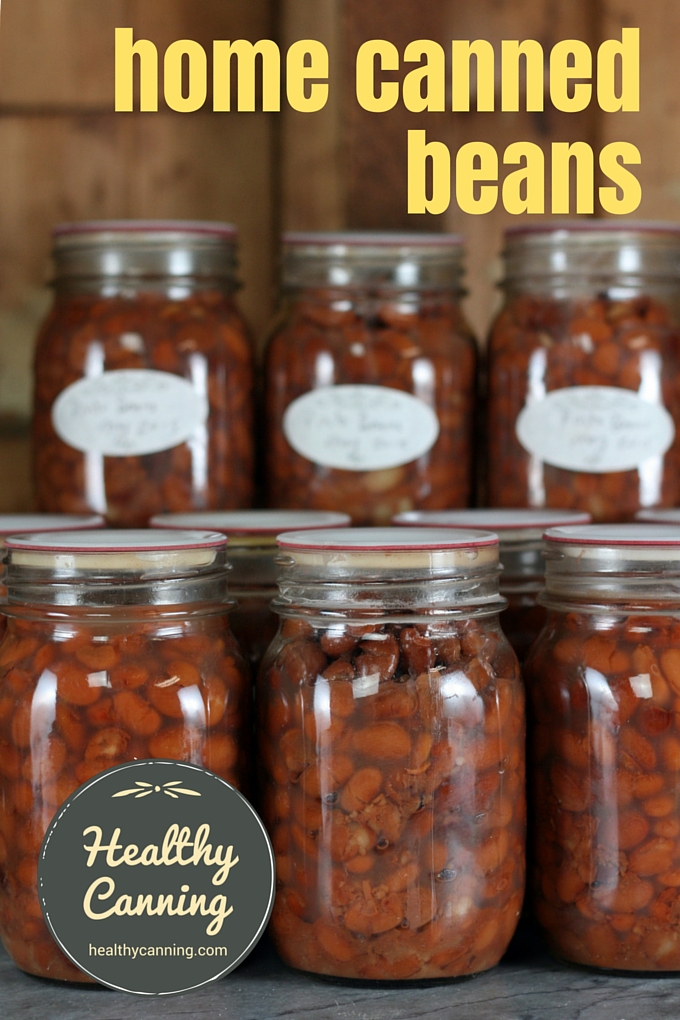
This page discusses canning plain dried beans. There’s a separate procedure for canning fresh beans.
There’s also a separate procedure for canning baked beans.
Tip! You don’t have to can all the same kind of dried beans in one go. If you have a large 23-quart canner in which you can double-deck, you could do 5 or 6 jars each of different varieties, so you’d be canning jars of kidney, pinto, chickpeas, etc, all at the same time. You could even, if desired, mix varieties of dried beans inside the jars.
- 1 Quantities of beans needed
- 2 The canning procedure for dried beans
- 3 Reference information
- 4 Source
- 5 Fresh water or simmering water?
- 6 False short cuts
- 7 Beans too soft after canning
- 8 Preparing dried beans for soups
- 9 Miscellaneous notes
- 10 Why make your own home canned beans?
- 11 Further reading
Quantities of beans needed
Numbers are approximate guidelines.
- Allow 175 g (6 oz) dried beans per ½ litre (US pint) jar.
- Allow 350 g (¾ lbs) dried beans per litre (US quart) jar.
A ½ litre (US pint) jar of home canned beans, drained, yields 300 g (10 oz) of cooked and ready to use beans.
The canning procedure for dried beans
Jar size choices: ¼ litre (½ US pint) or ½ litre (1 US pint) or 1 litre (US quart) [Ed: don’t forget to heat the jars before packing them with beans for canning.]
Yield: varies
Headspace: 3 cm (1 inch)
Processing pressure: 10 lbs (69 kPa) weighted gauge, 11 lbs (76 kpa) dial gauge (adjust pressure for your altitude when over 300 metres / 1000 feet)
Processing time: Half-litres (US pints) 75 minutes; litres (US quarts) 90 minutes
Preparing the beans
Here’s the USDA canning procedure for preparing dried beans:
Place dried beans or peas in a large pot and cover with water. Soak 12 to 18 hours in a cool place. Drain water. To quickly hydrate beans, you may cover sorted and washed beans with boiling water in a saucepan. Boil 2 minutes, remove from heat, soak 1 hour and drain. Cover beans soaked by either method with fresh water and boil 30 minutes.” [1] United States Department of Agriculture (USDA). Complete guide to home canning. Agriculture information bulletin No. 539. 2015. Page 4-5.
Note: the USDA Guide above says to soak them in a “cool place”. Another respected home-canning book, So Easy to Preserve, wants you to actually place the soaking beans in the refrigerator even: “cover and place in the refrigerator for 12 to 18 hours.” [2]So Easy to Preserve, 2014, page 86
Putting the prepared beans in jars
For actual bottling directions, we will turn to So Easy to Preserve:
“Fill hot beans [pre-soaked by one of the two methods above] into hot jars, leaving 1-inch (3 cm) headspace. Add ½ teaspoon salt to U.S. pints; 1 teaspoon to U.S. quarts, if desired. Fill jar to 1 inch (3 cm) from top with [clean] boiling water. Remove air bubbles. [Top up again with clean boiling water as needed to restore the 1 inch (3 cm) headspace.] Adjust lids and process… U.S. pints [half-litres] 75 minutes, U.S. quarts [litres] 90 minutes.” [3]So Easy to Preserve, 2014, page 86
Processing guidelines below are for weighted-gauge pressure canner. See also if applicable: Dial-gauge pressures.
| Jar Size | Time | 0 to 300 m (0 - 1000 feet) pressure | Above 300 m (1000 ft) pressure | |
|---|---|---|---|---|
| ¼ litre (½ US pint) | 75 mins | 10 lbs | 15 lbs | |
| ½ litre (1 US pint) | 75 mins | 10 lbs | 15 lbs | |
| 1 litre (1 US quart) | 90 mins | 10 lbs | 15 lbs |
Reference information
How to pressure can.
When pressure canning, you must adjust the pressure for your altitude.
What is the shelf life of home canned goods?
Source
Beans or Peas – Shelled, Dried: All Varieties. In: United States Department of Agriculture (USDA). Complete guide to home canning. Agriculture information bulletin No. 539. 2015. Page 4-5.
The USDA guidelines don’t mention the smaller ¼ litre (½ U.S. pint) size jar, but it’s fine to do so, and some people find it really handy to have that size for mashing into dips and for recipes, etc. It just has to have the same processing time as the next tested size up — that is to say, the processing time is the same as for U.S. pint, which is 75 minutes.
The Ball Blue Book guidance is essentially the same as the USDA’s: presoak, then a simmer for 30 minutes, then can. (Blue Book, 37th edition, 2014 , page 111.)
Fresh water or simmering water?
The USDA Guide calls for using the cooking water as the canning liquid. So Easy to Preserve, 2014, page 86 calls for “boiling water”, which might mean fresh water. [4] Andress, Elizabeth L. and Judy A. Harrison. So Easy to Preserve. University of Georgia Cooperative Extension. Bulletin 989. Sixth Edition. 2014. Ball says you can use either “hot cooking liquid or boiling water.”
False short cuts
Some people think they’ve come up with a shortcut of putting dried beans right in a jar, topping up with water, and processing them through a pressure canner. They say this saves time; also they say that if they do soak and cook the beans first, the beans get too soft after pressure canning.
The danger is that you will run into density issues. You really have no idea how dry those dried beans are — as they get older, they get drier, and require more and more water to rehydrate. It’s very unpredictable, as all cooks know. We have no way of knowing how long the beans were on a container ship or in a warehouse before they reached our store’s shelf, and how long they sat there in the store before we bought them and brought them home.
With that background, it’s easy to understand the danger: the beans could very easily soak up too much of or even all the water right at the start in the jar, causing very poor heat penetration through the jar, meaning the jar will be underprocessed and there’s no guarantee that all the nasties were sterilized away.
Beans also release a lot of starch when they are cooking. A lot. (That’s one of the reasons they are great for thickening home-canned soups.) Consequently the density of the liquid in between the beans in the jar is increasing as they are processed, slowing heat penetration. Precooking them a bit gets rid of some of that starch, and ensures that the beans are piping hot at the start to help ensure good heat penetration.
So the official advice from the experts is, it’s not safe to just can dried beans straight from dry, they must be rehydrated and cooked a bit first. Canned beans at the store are expensive but they’re not that expensive, so it’s not worth the risk trying to take a canning shortcut here.
Plus you get more reliable quality results, to boot:
Some rogue home canners … are using a new method: half-filling the jars with dried beans, covering with boiling water to a ½ -inch head space, then proceeding straight to the pressure canner. In unscientific testing of my own, I found that pressure canning using that method gave inconsistent results; the freshness of the dried beans was a factor. Within a few months, canned older beans looked withered and loose in the jar, having absorbed all the glorious bean broth.” [5] Barrow, Cathy. What sold me on pressure-canning at home. Washington, DC: Washington Post. 27 January 2015.
The National Center issued this safety warning in May 2019:
” A safe process time is partially dependent on jar size and type of food, yes, but it is also partially dependent on the texture of the food, the temperature of the food and liquid, and the weight of the food filled into jars. Dry beans sitting in water at the start of the process time will not heat up at the same rate as beans prepared as described in the research-based method described above and in the USDA materials. The final sterilization of the jar contents achieved by the end of the process will not be the same as when the process is applied to jars filled as described in the recommended methods. People canning their dry beans by other methods, and especially by starting with dry beans in the jars, are taking a big risk on food spoilage and possibly botulism food poisoning. Those doing this and getting away with it have just been lucky – so far. I guess part of my message is do not expect me to endorse or support this method of filling jars for home canning of dry beans. If you choose to do it, you are taking a chance by your own decision.” [6]Andress, Elizabeth. Canning Dry Beans: It Matters How They Go in the Jar. National Center for Home Food Preservation.
It is true that in many factories this may be how it is done — dried beans straight into the tin. But, they have the ability to control all these factors:
- just how dry and old the dried beans actually are, as well as the size and weight range of each bean;
- the exact tin size and shape;
- the exact quantity of beans that goes into each tin;
- the exact processing heat, exact processing time and exact cool-down time;
- and, they have controls to raise alarms when the slightest thing is amiss.
In home canning, we’ll just never ever have these kinds of industrial controls, so the home canning process was designed to cover all the different variables that take place in our kitchens.
Beans too soft after canning
Some people feel that the home canned beans can be too soft after canning for use in salads, etc.
That can vary. It can vary based on how old the dried beans were that you started with. First a warehouse stores them, then a store, then you. The older they are, the drier the beans will be, and the drier they are the longer it takes for them to absorb water. That’s exactly why recommendations have you both soak and pre-cook a bit, because they can’t predict for hundreds of millions of people just how fresh their dried beans are going to be on any particular day.
If you start with really old, hard dried beans, chances are you might end up with some home canned beans that are a bit firmer.
And buying them in tins from a store isn’t going to help: most people have the exact same “softness” complaint about store bought ones in tins.
The best way to assure yourself though, of “tender to the bite” beans for salads, is to pressure cook them as needed instead of canning. Your pressure canner also makes a free, bonus, kick-butt pressure cooker. You can’t say you are afraid of pressure cooking if you are already pressure canning! Your pressure cooker manual should give times for them; if not, consult the dried bean cooking advice on a pressure cooking site such as hippressurecooking.com.
In this way, you can get the ideal texture of beans that you need for salad, quite quickly. This can be especially true of more delicate beans such as black (aka turtle) beans. And for something where the texture really is make or break, like a salad, it can be worth that special effort to pressure cook a one-off batch.
Preparing dried beans for soups
When you are preparing dried beans for use as an ingredient for use in the USDA “Your Choice” Soup recipe, the procedure is a little shorter, because you skip the 30 minute pre-simmer.
Just rehydrate, either via the overnight method, or the quick rehydrate. Then, bring to a boil, then drain. The beans are then ready to add to the soup mixture to be canned using the USDA recommended procedures.
The National Center for Home Food Preservation says, “You MUST fully rehydrate [dried beans or peas] first so as not to alter the measurement of water in the final products…. If you are using dried beans or peas, then add 3 cups water for each 1 cup of beans or peas, boil 2 minutes, and then remove from heat. Soak for 1 hour, then again heat to a boil, and drain.” [7] National Center for Home Food Preservation. Blog post: If you haven’t stored your pressure canner for the season. January 2013. Accessed March 2015.
Miscellaneous notes
It’s fine to add a sprinkle of dried herbs such as oregano, epazole or marjoram, or some onion flake or pepper flakes, to a jar of beans. See: Seasonings. Just bear in mind though that the plainer you can them, the more flexible they are when you open them.
Pressure cooker users may wonder why bother canning beans, since even uncooked beans can be cooked up so quickly in a pressure cooker. It’s really just a convenience thing, when you are frantically trying to throw together a dish or an emergency party dip you just got saddled with making on top of a bunch of other chores or when time is extremely limited.
To confirm and be clear, there is no safe option for home canning dried beans other than pressure canning already rehydrated beans: it is the only safe and guaranteed safe home canning method, regardless of what anyone says otherwise.
Why make your own home canned beans?
Buying cans of cooked beans such as kidney, pinto, chick peas, etc, ready to use can be expensive compared to dried beans. But, even though it’s more efficient to store dried beans in their dried state, we still all like the convenience when needed on busy days of grabbing some beans ready to use right then and there.
It’s really cheap and easy to make your own home pressure canned beans at home, and you can make them salt and preservative free.
Here’s an excerpt from a Washington Post article by Cathy Barrow on home canned beans.
Cooking beans via the pressure canner is my favorite way to go. The beans’ essence seems almost enhanced, with a velvety texture and exceptionally fresh, nuanced flavor. In the past month alone, I’ve made minestrone, black bean burritos, cassoulet, hummus and ribbolita. What I like best about them is their broth. Steve Sando, the effusive founder of online heirloom dried bean retailer Rancho Gordo, agrees: ‘The bean broth, to a bean person, is just as important as the bean. When you use commercial beans you have to wash it off.’
According to the Bean Institute, draining and rinsing commercially canned beans removes up to 41 percent of their sodium content. Of course, cooked, no-salt-added beans are more widely available now, as well as the new asceptically packaged beans. But none of them includes that creamy, flavorful broth. When you can your own beans at home, it’s possible to enjoy the broth and control, or eliminate, the salt. No bean recipe, whether it involves cooking up a pot on the stove to eat now or preparing them for canning, can escape a debate: to pre-soak or not to pre-soak. For canning, the National Center for Home Food Preservation recommends pre-soaking and simmering beans before pressure canning. …..
I pressure-can black beans, pinto beans, kidney beans and cannellini beans, as well as black-eyed peas, borlotti beans and my personal favorite, Rancho Gordo’s Moro bean, which is a sensational choice for refries. Garbanzos get a workout as hummus or chana masala. Tarbais are cassoulet-ready. Because all those beans take the same amount of time to pressure-can, it’s possible to process several varieties all at once — brilliant efficiency, to my mind. Most pressure canners hold seven quart jars or 19 pint jars, or about 3 ½ pounds of dried beans, processed.” [8] Barrow, Cathy. What sold me on pressure-canning at home. Washington, DC: Washington Post. 27 January 2015.
Further reading
Andress, Elizabeth. Canning Dry Beans: It Matters How They Go in the Jar. National Center for Home Food Preservation.
References
Rachel
For the life of me, I cannot figure out why I am loosing seals on my beans once they are in the pantry. Everything seems to be just fine when I can them, and my other foods do fine too. The beans are making me crazy! I have thrown so many jars full away.
Joao
Are the dried amoubts for the beans here for soaked beans? How should i calculate it for soaked beans?
Shannon
Is it safe to can dried soybeans this way?
Suszanne
When canning beans in quart jars, exactly how full do I fill jars with soaked/cooked beans? I know by that point they will have expanded and perhaps that will not be an issue and I know to fill with boiling/water cooked in up to leaving a one-inch space before sealing the lid. Not new to canning, but new to this particular process and very excited. Wanting to can my five beans for chili making season (fall and winter).
Thank you for this information provided here and thank you in advance for any information you can provide for me on my particular question, again just wanting to know where I stop adding beans to my quart jars and then add water.
Healthy Canning
Fill hot beans [pre-soaked by one of the two methods above] into hot jars, leaving 1-inch (3 cm) headspace. Add 1/2 teaspoon salt to U.S. pints; 1 teaspoon to U.S. quarts, if desired. Fill jar to 1 inch (3 cm) from top with [clean] boiling water. Remove air bubbles. [Top up again with clean boiling water as needed to restore the 1 inch (3 cm) headspace.]
Cindy
My peas are purple hull peas similar to blacked eyed. But they get a grayish gravy at the top of the jar. Is this normal after 6 months? If so, if the water has drawn down some, are they still good?
Healthy Canning
If you pressure canned them exactly according to the directions for dried beans, you are good. What you are describing is normal.
LB
Thank you for this article. I was seeing all sorts of methods online. None explained why it was important to soak beans prior to canning them. This is the only article I could find that actually explained why and how to do things safely. Much appreciated!
Francesca
Hello, I can see this recipe is for dried beans and there is an additional link for “fresh beans” but that link appears to be for green beans. I grow haricot beans (french) and am looking for canning instructions. Do I start on this recipe for the point at which the beans have been soaked/rehydrated? Or is there an alternate link for canning fresh picked beans which are not green beans?
Healthy Canning
Fresh haricot variety beans, as in thin French green beans, would count as green beans.
Laura
Just to double check – if you have fresh shelled beans (so the actual bean, not the chopped up pods), which instructions should you follow? Thank you!
Healthy Canning
The National Center for Home Food Preservation gives these directions for shelled fresh Lima beans. https://nchfp.uga.edu/how/can_04/beans_lima_shelled.html. Contact them to see if they will support those directions for other fresh beans as well.
Joan Audino
Following the recommended pressure canning procedure, would it be safe to soak beans in salt water, discard that liquid, then cook for 30 min. in Better Than Bouillon stock and use this cooking water to can beans in?
Thank you.
Healthy Canning
So basically, you would be seasoning the water. We are told that is fine. See: Safe Tweaking of home canning recipes
Sara
Hi! Is there a way to pressure can cooked bean?
Healthy Canning
No. The issue in home canning would be the density — it would be too dense and prevent proper heat penetration. I realize that factories have specialized techniques to can mashed beans, such as refried beans, but they’ve paid a fortune in consultants and equipment to get those guaranteed safe processes in place. For home storage of already cooked beans, freeze them.
Mary
I do not have a pressure canner, how long do I process pre-cooked beans (pressure cooked) in a hot water bath? Thank you!
Healthy Canning
You do not process them in a hot water bath. You freeze them instead.
William Stepherson
Can you can any leftover bean broth as just broth? If so, how long is the process time?
Thank You
Healthy Canning
Freeze it.
Stephanie Cain
Would this be the same time/method for canning leftover chili (without meat)?
Healthy Canning
The USDA actively recommends against trying to home can leftovers of any kind. There is a tested chili recipe: you can make it and leave out the meat if you wish. https://www.healthycanning.com/home-canned-chili/ As for the leftovers of your own chili recipe: freeze them.
Stephanie Cain
It says to leave a 1″ head space. Do the soaked beans expand more during the cooking? A little concerned about the head space, I don’t want any jars to explode 🙂
Healthy Canning
The 1 inch (3 cm) headspace is all you need. If more were needed, the repeated tests they went through to arrive at that would have revealed it. The soaked and partially simmered beans that you put into the jars for canning have pretty much expanded all they are going to.
The exception is if you are using Tattler lids — in that case, you want about 1 1/4 inches (3.5 cm) just to allow a bit more boiling room inside the jar during processing.
Stephanie Cain
Thank you!!
Lisa
What if my beans are dry in the jar and soaked all the liquid? Are they still edible/safe to eat?
Healthy Canning
Hi Lisa, did you follow the USDA procedures exactly: pre-soaking the beans, pre-boiling them, etc?
Rebecca Elliott
Oh, the lids. I’m not sure what lids these jars had since I have already disposed of them. I think Ball. I did have some very old lids (never used) but stored lengthy time, someone gave me. I may have used those.
Healthy Canning
After a processed jar has cooled for 12 to 24 hours, I remove the canning ring, and lift the jar by the rims of the lid to test the seal. If it sealed, I wash the jar down, testing the seal again while doing that, then let the jars dry, label them, and then as I place the jars on the shelf I test the seal on each one last time. Despite testing the seals three times, I’ve still had the (very) occasional seal lost while on the shelf. I always put the jar and lid in bright light and inspect it to see why. 99% of the time I find some food stuff on the outside rim of the lid, where the rim of the lid would have contacted with the jar rim, and I wonder how it sealed in the first place. I guess it was a seal, but a weak seal, or a false seal. That seems to happen either with food that expands a lot during processing, or because I did pressure increase / decrease too fast while processing. Either “thing” (the expansion, or me being sloppy with the pressurization) forced some food up onto the rim. The metal lids are a tad more tolerant of this than the Tattler lids, but not much, because I’ve had the false seals with both. Over the past 6 months, I’ve increased my 1 inch headspaces by 1/4 inch on the advice of the Tattler people , and that has made all the difference for me on both Tattler lids and metal lids — that increase in headspace is a bit more friendly in my personal results to the variables that can occur to food inside a jar while processing, it seems. That being said, I’d never presume to counter advice that a metal lid maker such as Ball or Bernardin will give about their own lids and head space. But I note that as far as the NCHFP is concerned, it does allow us the discretion of using 1 inch TO 1 1/4 inch of headspace for low-acid foods: “Elizabeth Andress at the NCHFP expands a bit on the last headspace category, saying, “1 to 1 1/4 inch for low-acid, that’s to allow for temporary expansion and boiling during pressure canning.” ” https://www.healthycanning.com/home-canning-theory/the-role-of-headspace-in-home-canning/
Rebecca Elliott
I love to have dry beans canned and ready to use. Unfortunately, my last batch of pintos was a fail. I follow explicitly the directions in re-hydrating, pressure canning, etc. I usually get one jar that won’t hold seal, but this last batch I had six of seven quarts lose seal. I think my problem might have been the age of the beans. They were older, so may have required a longer time for re-hydration. I am also going to try to ‘soup-up’ my jars a bit more. Maybe a bit more liquid to bean ratio before processing. And, allow more head space. Any other suggestions? It is so heart-breaking to spend so much time and care into having a product only to be met with disappointment.
Healthy Canning
Do you mean, lose seal on the shelf? Or not seal after processing? What type of lids? I personally have had increased greater sealing success by going 1 1/4 inches on many things that expand a lot during processing, such as beans — the extra 1/4 inch for breathing space during processing seems to make a lot of difference.
Rebecca Elliott
I usually notice one jar not sealed once cooled down and ready for clean up to go to shelf. That jar always gets eaten right away, (usually supper that day). The jars I am referring to in this case, however, lost seal on the shelf. They had not been stored longer than 3 months time, and appeared to have a good seal when they were placed on the shelf.